Adobe Lightroom & Tips
I'm relatively new to photo editing, but this week's venture was an experience. I am familiar with the standard photo editor but having access to any Adobe editing software is vastly different. It's more versatile in its options and more specific as to what exactly you want to change in the photo- you can draw an image out or even change the picture's hue entirely- it's all up to the editor. There is a certain amount of precision in photo editing, much like film making editing can completely change the meaning or the way the image is to be viewed. For example, if I were to change the image's focus point, I can subtly tell the viewer's eye where to look.
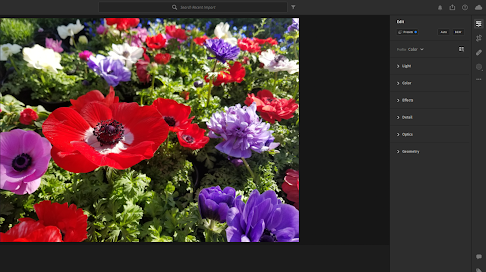
For my sake, here's a rundown of how the software works. There are four tabs on the right hand side: Edit, Crop & Rotate, Healing Brush, and Masking.
Edit
The edit tab is the core of the editing software. You can adjust the Light, Color, Effects, Detailing, Optics, and Geometry. For example, under the light, you change the levels of exposure to highlights within the image, and it's white and blacks. The color tab individually separates the color for editing, but you can access them all at once under the color wheel. The Effects tab allows you to adjust the texture and clarity and add in a vignette or grain if desired. Finally, the optics add to the effects, as it has the sharpening tool and noise reduction.
Crop and Rotate
As the title suggests, you can cut the image to your liking, as well as physically alter the photo how you like. For example, if your photo is crooked, you can use the straighten tool to adjust as you see fit and mirror the image from left to right, top to bottom.


Masking
The masking tool is like a filter but more customizable. The two specific features I used in the Spark video was Linear and Radial gradient. For usage, I have this light photo of a tunnel with bright greenery in the back. I can use the radial gradient to emphasize the darkness of the tunnel's circular shape and lead the viewer's eye to the foliage at the end of the tunnel. For the photo below, I chose the linear perspective gradient and rotated it on the right hand side.

Photo editing is much more complicated than I anticipated. Still, it's much more exciting and fun to mess around with once you understand what tools can enhance your photo altogether. Especially if you have photo shoots or want to emphasize the drama or color, it's all possible with the right tools and editor.


Comments
Post a Comment